Branching in git is a wide topic. It is one of its main great features. A local git repository is made in a directory using:
git init
This will create a branch, the default branch named master. To create new branches type this command:
git branch branchname
To switch to a branch :
git checkout branchname
Actually creation and switching can be done together by using the following command:
git checkout -b branchname
When you create a new branch it will contain all the contents in the master branch. But it will also contain some extra contents which is created inside
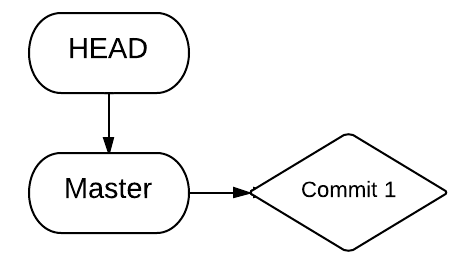
Current repository state
that branch which is not available from the master branch. So you are creating a copy of the master branch in which you make some certain changes which is not available in master branch. This is useful when you want to try modifying certain codes.
If you are working for a certain organization and you have its source code available from a certain remote repository. You clone it. And you encountered a bug and you want to make certain changes in the code. But not sure whether it actually works, then you make a new branch and make changes in it. After testing, if it is found that the changes made are indeed correct to resolve the problem, the branch is merged with the main branch. It’s simple.
So here we make a new branch Sample, after the first commit in the master branch and switch to it. It is done as follows:
git checkout -b sample

After creating the branch sample
Now whatever commits we make, all will get stored in the working register of sample branch.
After switching back to the master branch, if we make any new commits it will get stored in the working register of the master branch and wont get reflected in the sample branch.

Commiting after switching back to master branch
Any branch can be merged to the current branch by using the command git merge. Here we can merge the branch Sample to the main branch, Master. First switch to the master branch and then type the command:
git merge sample
Yea, its done. Now if you want to delete any branch then you can use the command,
git branch -d <branchname>
But one thing should be kept in mind when you are deleting the branch. If you want to delete a branch then you should first switch to some other branch. Or else it would be like cutting the branch of a tree in which you are sitting. So first you have to jump to some other branch of the tree and then cut the desired one.
There are many more stuffs that can be done using branches in git. This is just a beginning.


